Thursday, April 28, 2016

Steady on

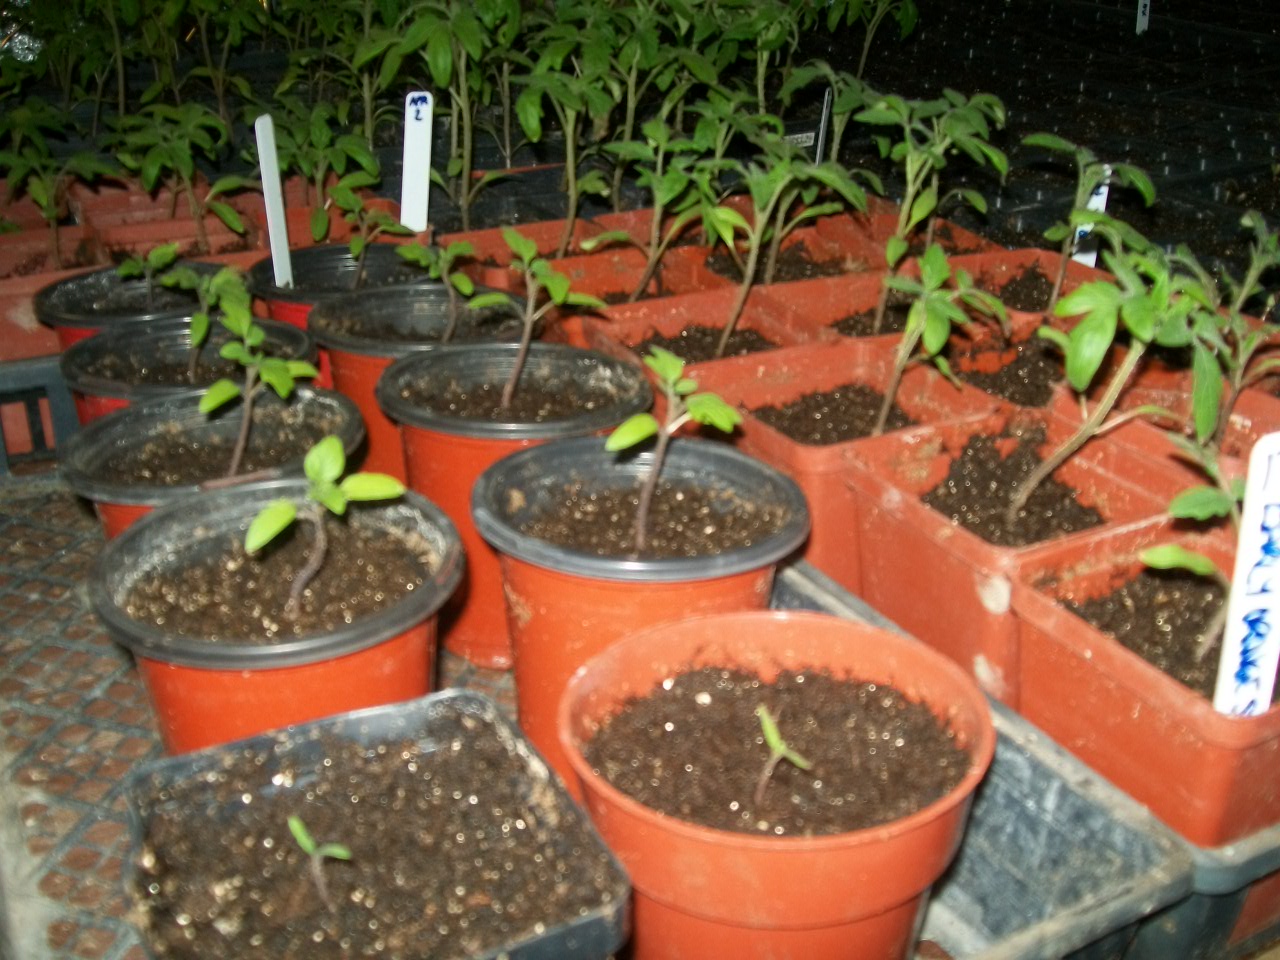
This is a quieter week in terms of activity to write about on the veggie front.  Many of the varieties have been in the soil for a month now - seedlings all over the place.  The earliest to plant are the varieties that need the most development prior to being set out in the field or cold frame, such as tomatoes, peppers, onions, lemon grass.  A few other things that I have started are lettuce, cabbage and of course, the carrots have been set out to seed this week in the experimental heated planting bed (see last week's post).

With regard to the heated bed, I have experienced some minor setbacks with the heat source (furnace) being the culprit 3 out of 4 times - the other time was my own fault, forgetting to check on the fire and it went out.  I have been tracking and recording temperatures several times daily, so I will be able to plot results in a more visible graph method.  So while not too much vegetable activity is required, we have been doing spring cleanup in the yard - deadfall and firewood cleanup, last year's pots and such that didn't make the trip back to storage...all the usual things you would find after winter.

Here are a few photos of the seedlings - a glimmer of hope that summer is coming!


Wednesday, April 20, 2016

Part 3 - Heat controlled planting bed

Over the weekend, I was able to complete the plumbing of the heating system in the new Hot House.  Once I had the system assembled, I connected the hot water from our wood stove and checked for leaks. Only a couple, but quickly fixed. It was mid-afternoon and a heavy rainstorm was moving in so I wanted to be sure that everything was working to save being out in the rain doing final connections.

So the bed temperature was only a few degrees above 0 C, and the water coming in was around 50 C. In about 16 hours, the soil mass had increased in temperature to about 14 C. Stoking the fire, I got the water temperature up to about 70 C and while the cold weather Sunday and Monday passed, the heat mass of the planting bed seemed to be stable, but too cool for what I had planned, to be able to control the temperature around 24 C. However, I did add 80 litres of ice-cold water to the bed in that time and the heat had to rise up through 45 cm of soil - this would make the heat up time a bit slower.

So Tuesday and Wednesday have been much warmer and the furnace water has been coming in at a more regular temperature range, 60 to 75 C, depending on the state of the boiler. Tonight, the bed temperature has exceeded 24 C and is at about 32 C! So it is a very slow process to heat the soil in the planting bed, but with a bit of ambient heat gain, it has warmed the bed nicely and is holding well.

Observations will be kept and by Saturday, I should be able to put the carrot seed in place both in this heated bed and the control plot in an unheated bed. I will post the results as the carrots start to sprout!


Thursday, April 14, 2016

Bumblebees and Pollinators

There is always something to learn.  As we have been ramping up this market garden project of ours over the last 5 years, I recognized that poor vegetable success isn't just a case of poor soil or lack of water or even what seems to be unusually cool weather.  Pollinators, whether actual honeybees managed by a beekeeper or bumblebees, naturally occurring are key to having a great vegetable crop where the plant flowers need pollen transferred from flower to flower.

An excerpt from the Xerxes Society's website - http://www.xerces.org/bees/

     "Bees are undoubtedly the most abundant pollinators of flowering plants in our environment. The service that bees and other pollinators provide allows nearly 70 percent of all flowering plants to reproduce; the fruits and seeds from insect pollinated plants account for over 30 percent of the foods and beverages that we consume. Beyond agriculture, pollinators are keystone species in most terrestrial ecosystems. Fruits and seeds derived from insect pollination are a major part of the diet of approximately 25 percent of all birds, and of mammals ranging from red-backed voles to grizzly bears. However, many of our native bee pollinators are at risk, and the status of many more is unknown. Habitat loss, alteration, and fragmentation, pesticide use, and introduced diseases all contribute to declines of bees."

What we have seen in our yard is an increase in the number of bumblebees, year after year. After a poor year with growing squash and pumpkins in 2013, I had vowed to hand-pollinate in 2014, which I did, every morning possible.  It improved our crop production quite a bit.  While out in the garden, I did notice there were a few bumblebees around the squash flowers, but only a few. Then in 2015 it was an amazing time amongst the squash varieties and the cucumber trellises, with hundreds of bumblebees of a few varieties buzzing the flowers and moving pollen to our advantage while collecting it for their own use in the hive.  Another interesting feature in our yard was the oregano plant in our front garden.  The bumblebees loved this plant with it's delicate purple blossoms, visiting it from first light until early evening.  So what had changed?  We were building a natural habitat that the bumblebees thrived in.  Other features I began to realize were contributing to this change were the massive crop of Canada Thistle south of the garden, and the untouched section of grassy land north of the garden featuring Timothy, Brome Grass, Black-eyed Susans, Daisies and some other wildflowers.  The heavy grass and stems close to the ground are a preference for nesting.  A little further afield we do have some old, rotting tree stumps, logs and branches some of this pushed into piles with a bit of soil left in them.  This also is a favorite for nesting bees.

When I was cleaning the greenhouse, I did find some bumblebees that got trapped inside and had died.  So I carefully collected them and took photos of the three bumblebee types.  The most interesting to me is the Tri-colored Bumblebee, with a double orange stripe on it's abdomen.  This is the variety of bee that likes the Oregano plant.  The other 2 I have yet to identify for certain, but these are the type I've found around the other plants in the garden.


This year I have the Rocky Mountain Bee Plant that I am adding to the yard which is especially attractive to bees.  I will also be sure to grow a larger variety of flowers and also watch that the habitat structures around the yard do not get changed.  So it will be interesting to observe any changes to the bumblebee population this year.

A few other websites that feature great information on bumblebees and pollinators:

http://pollinator.org/canada.htm
http://savethebumblebees.com/index.html
http://farmsatwork.ca/pollinators/native-bees?_ga=1.27851508.915607232.1439311347

Thursday, April 7, 2016

Part 2 - Experimental planting beds – know your veggies!

Research is Important.

We have a book called, “The Vegetable gardener's Bible”. The title indicates it is a book you should be reading every chance you get regarding your veggies. I would give the book a good mark in this case – it is full of info, useful, day-to-day info that you shouldn't even begin to memorize, since it is nicely tabulated in this book.  You will learn and retain the info you most need to know, but the book will always be nice to go back to every year.

One thing I was unaware of until I had this book is the fact that certain seeds need certain temperatures to germinate. I wondered why our carrot seeds didn't start well if we had cool days, sometimes even if it was partly sunny, but not super warm. Yet, cucumber seeds just take off and grow and beans seem to be the most tolerant in terms of early seeding and survival. In the book, it says that carrot seeds need 24 degrees to germinate well. That is quite a requirement in terms of needing that level of heat for the 6 day germination period. Soil in the sun has to warm up in the morning and only keeps it heat when the sun is out. Of course, there is the case of frying the seeds if you don't have enough water to keep the soil wet at the same time the sun is beating down on it.

My new greenhouse has an experimental planting bed will accomplish a consistent temperature control to maximize the seed start. This will allow earlier seeding in the year than one can successfully accomplish outside. So here is the plan.

A planting bed with water line run through the bottom of it in six passes, giving about 120 feet of line in the 60 square foot planting bed. This line will exchange the heat from our outdoor woodstove to the soil. The soil temperature will be monitored with an adjustable thermostat set in the soil, the thermostat will control a valve in the hot water line to the planting bed. Because there is a large mass of soil with 60 square feet and 18 inches of depth, heat exchange should be quite even and easily controlled in this way. I will also have a portion of an unheated planting bed for the same carrot seed and use it as a control model – basically comparing the two plots and recording results. I am excited to see what will happen and will update as data becomes readable.  So in about 2 weeks time I should have things well underway.  It is going to be exciting!


Thursday, March 31, 2016

Our New Hot-House – A Two Year Project – A Three Part Story

Part 1 – Construction of a large indoor work space for seedlings and early transplants.


With learning how to prepare for the growing season, a number of projects have been implemented on our farm. One of those projects was to build a small “hot-house”; a lean-to styled building that we built on the South-west end of our equipment shed in 2012. It was 20 feet wide by 7 feet high and 7 feet deep with a fixed 20 foot long bench along the windows. The Southwest facing wall had 20 feet of window glass about 3 feet high and a polycarbonate roof that allowed lots of light into the space. This is where we first tried to grow peppers and tomatoes. Since it was a small space, we created a removable shelving system above the bench with some steel tubing, allowing for a second row of planting trays to be placed above the ones on the bench. Inevitably, it was too crowded and with the low ceiling and it tended to be quite hot inside so we had to be careful not to fry the young plants on a sunny day. Of course, on a cold and cloudy day, we needed to supplement with a heating system, so we added a small heat exchanger and fan, pumping hot water from our outdoor wood stove to the hot-house to keep things warm and comfortable.


As we increased in vegetable production, our facility was becoming too small so we soon recognized the need for a bigger “hot-house”. So in the spring of 2015 we decided to expand. The plans were drawn up. Quotes were given. The materials were ordered. While using the existing hot-house last spring, we built the new one right over top of the old one at a size of 20x30 feet instead of 20x7. Once we had the new hot-house roof in place, we dismantled much of the old hot-house a few pieces at a time until all the transplants were moved out to the field. The new hot-house is built with a post and beam method with structural roof trusses and clear polycarbonate roofing to ensure the sunlight can get in. Inside, there are four raised beds, two of which are set up for experimental use, the other 2 are control models. The North end of the hot-house is insulated at an R-12 value for the first 8 feet (walls and ceiling) and a transparent separation curtain can be placed at the 8 foot mark for early season work, keeping the heat in a smaller space but allowing sunlight in. The walls around the hot-house are sectioned in approximately 4x8 foot panels with the first 2 feet at the bottom of these panels clad in weather resistant plywood and insulated to about R-5. A larger heat exchange system is in this space to allow us to continue to do early season work, the heat still being taken from our outdoor wood stove. We don't have any seedling shelving in the new space, so we will quickly realize the need in only a few weeks time. Spring is on the way!


Tuesday, March 22, 2016

Farm With A Barn

A farm is not complete without a barn. A red barn with white trim is preferable! When we decided to build a barn, we had no idea how it would end up looking because so many changes have come along through the building process!

We knew we wanted the classic look in terms of style, shape, color. We knew we wanted it to function in certain ways – to be used for certain things. So, the rafter shape had to be classic gambrel (Dutch barn) style, a chicken coop was a must as we had chickens in a makeshift space in our shed, a secure storage room for feed and supplies, a stall in the back for Shadow, the very intelligent but bratty pony, a hay mow for the hay to be kept clean and dry and then of course, there's always a need for storage. Searching the internet for a suitable truss plan was foremost and completely achievable. I was able to find a plan and scaled to the footprint we wanted at 32 feet wide.

Sourcing material for much of the project was straight forward, but the hay mow (loft) would be spanning 16 feet from beam to beam under the considerable load of hundreds of hay bales. Lumber that is capable of this load is not available a the local home improvement center, so I went to a local sawmill and found the ideal material for this application, a rough sawn 2x10, fully 2 inches by 10 inches. Based on the building code for joist spans, these full dimension 2x10 are perfect for the application.

The decking for the mow was also picked up at the sawmill, full dimension 1x6, the wall studding as 2x6, and the trusses were sourced from yet another sawmill, clear lumber with no knots, 2x6 inch full dimension. My Dad, knowing lumber from growing up in a sawmill family, was impressed by the rafter lumber's excellent quality!

While choosing all this lumber, we were unable to get the 8 foot length for the wall studs, so the sawmill offered 12 foot substitutes. From there, somehow, we chose to make the barn much higher with 12 foot walls. Suddenly, the building had a real scale to it! With 12 foot high walls and the large gambrel rafters, we now have a barn at 29 feet high! This brings me to the next point, roofing the building. After much debate on color, we chose a dark green shade in classic “Barnmaster” style roofing steel. Installing the steel was a very tedious and slow job, especially with the weather of late September becoming wet and unpredictable, never mind the heights we were working at!

Currently, there is still a lot of finishing to do, but the barn is usable and closed in for the most part.
As needs arise, we will finish up sections to fit the need; and there always seems to be a new need on the farm!


Thursday, March 10, 2016

Greenhouse Construction Project

When we realized that there might be some potential to grow Heritage Produce in our yard, the thought of a greenhouse came to mind. What would be better than to have a controlled growing environment right in our own back yard? With that, planning started. A modest greenhouse can be purchased for about $4000.00, one with a steel frame, about 20 feet by 40 feet in size. It needs to be shipped to site, site prepared and greenhouse built, covered and ready to go. Our frugal ways challenged that there must be a less expensive way to accomplish this. With a bit of reading and some prior background in wood construction, I felt I could build a frame that would cover 1000 square feet of ground for about ¼ the cost of a purchased greenhouse. I drew up a truss pattern, did a layout, then scaled it to size. Using 1x4 material, wood glue and a few pounds of screws, I started building 22 half-trusses. Each pair were to be set five feet apart, mounted on steel anchors, giving us a 24 x 50 foot unit.

 
Once all the trusses were constructed, the next major step was to prep the ground prior to placing the greenhouse. We wanted to get as much soil loosened up as possible, so we used the plow and set it to cut at maximum depth, turning well over 8 inches of fallowed soil. From there, the area was surveyed to determine level, string-lines were placed and the steel anchors were driven into the ground. Then the trusses were placed and tied together with a simple 1x4 ridge piece being installed as we went.


Once all the trusses were placed, we had the whole family out to pull the plastic up and over the frame.
With that, end wall structure was built and the greenhouse was closed in, complete with door frames, roll-up vents made out of ½ inch electrical conduit attached to the bottom edges of the plastic. In the year following, we added micro-sprinklers along each side of the greenhouse, hanging from overhead, allowing the most natural method of watering the plants. The last photo shows the lush production  The total project cost was about $1100 including the plastic - about 1/4 of the cost of a commercial unit.